Entry Coat Closet Organization (Tips & Tricks)
I’ve owned three homes, and this one is the first one in which we’ve actually had an entry closet. In previous houses, we kind of just had to figure it out with hooks on the walls or keeping things in our rooms. It’s wonderful to have a closet right by our front door but, I’ll admit, it’s taken me some time to figure out the best system for coat closet organization for our family.
Our little coat closet has seen a lot of change in the three and a half years we’ve lived here. But, last year I finally installed a DIY built-in organization system, and that has been a game changer for us. The only problem? Pretty shelves only do so much good if the shelves themselves aren’t organized!
A couple of weeks ago, I got sick of the chaos (again), and decided to do something about it. I’m working with The Container Store over on Instagram as an ambassador this year, so I did a ton of browsing and planning over on their website and came up with a plan.
And so far? It’s holding up pretty well!
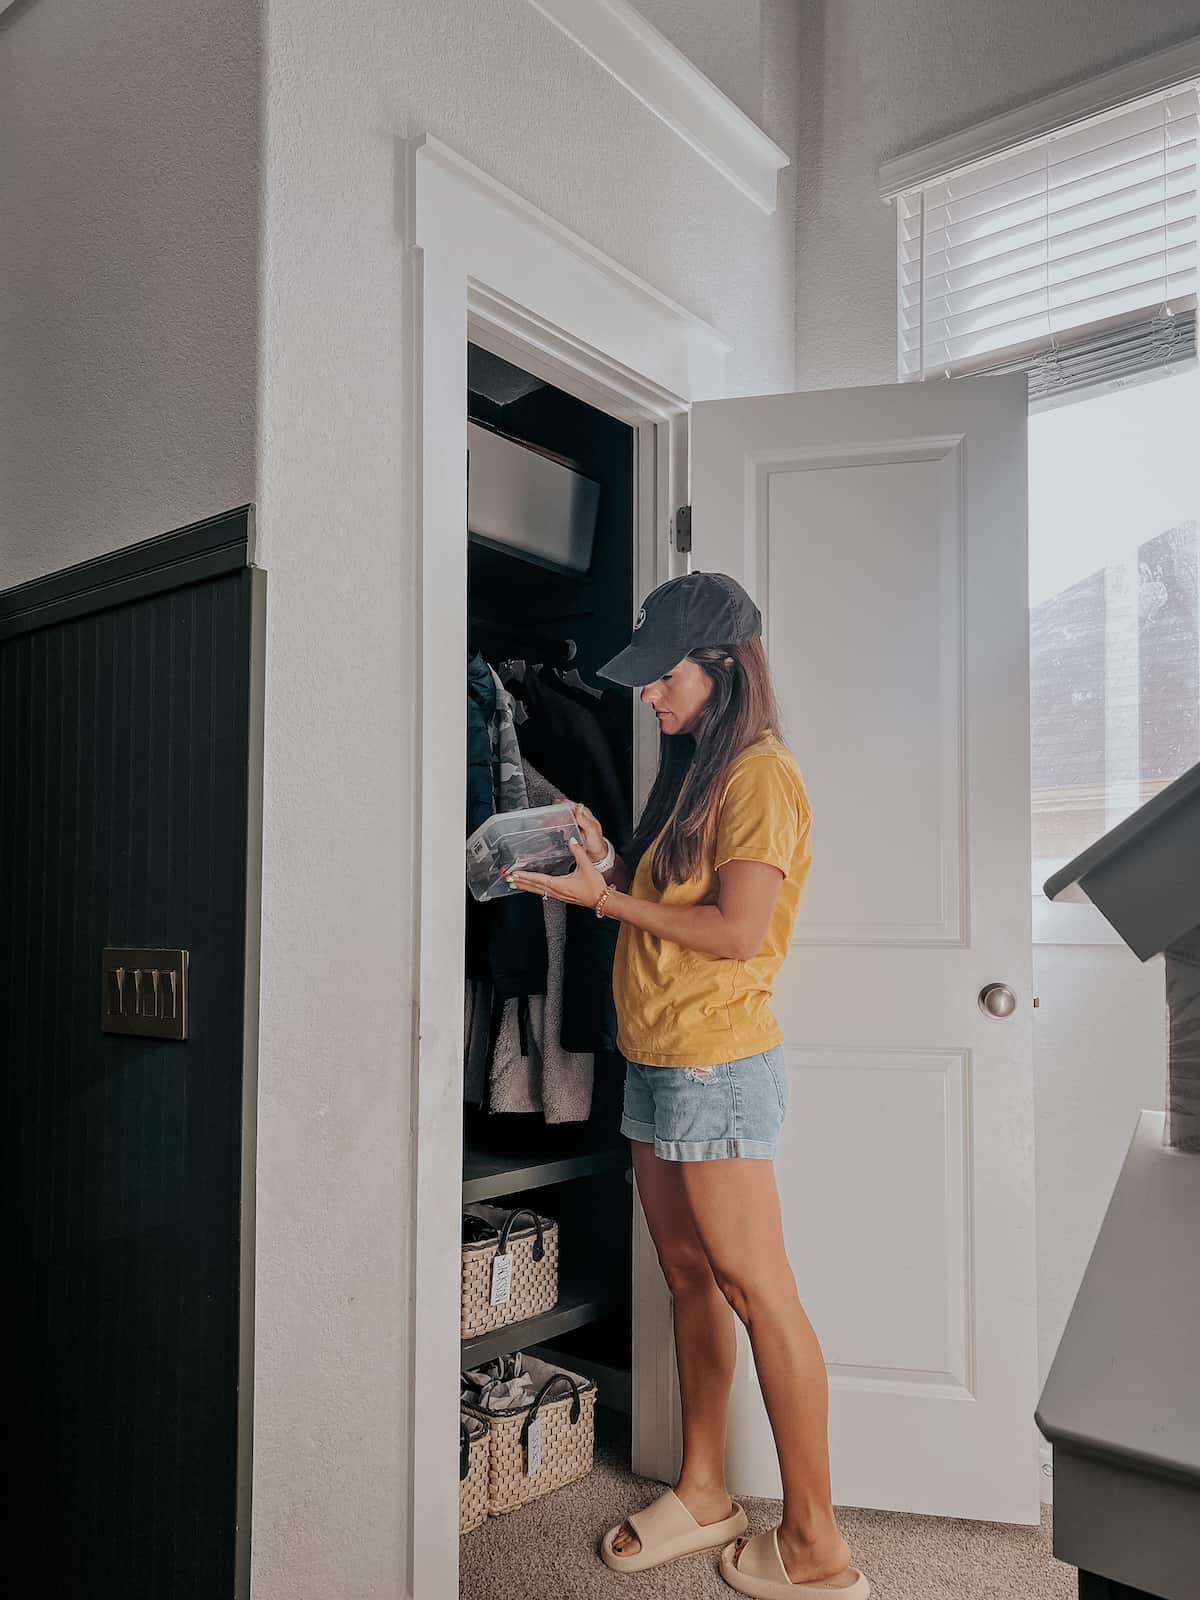
Entry Coat Closet Organization Tips
As we all know, I’m not a pro when it comes to keeping a coat closet organized. But, I have learned a lot of lessons in my time trying to figure it out so far. So, here are five quick tips that will hopefully help you get started on getting yours organized too.
1. Make a list of what needs to be stored in the closet.
The first (and most important) step to take is to plan out everything you need to store in the closet. Sure, you probably have a general idea in your head of what goes in the space but do you know everything?
I found one of the most helpful steps in the process this time around was to actually write down all of the things we store in here or would like to store in here. This should include the things you don’t technically store in the closet that somehow end up in the closet anyways.
Once you’ve got your list, make a plan. Think about a space inside that closet for each and every category of items. I even took the time to sit down and use Canva to plan out how things would look and fit on the shelves before I even hit the “order” button!
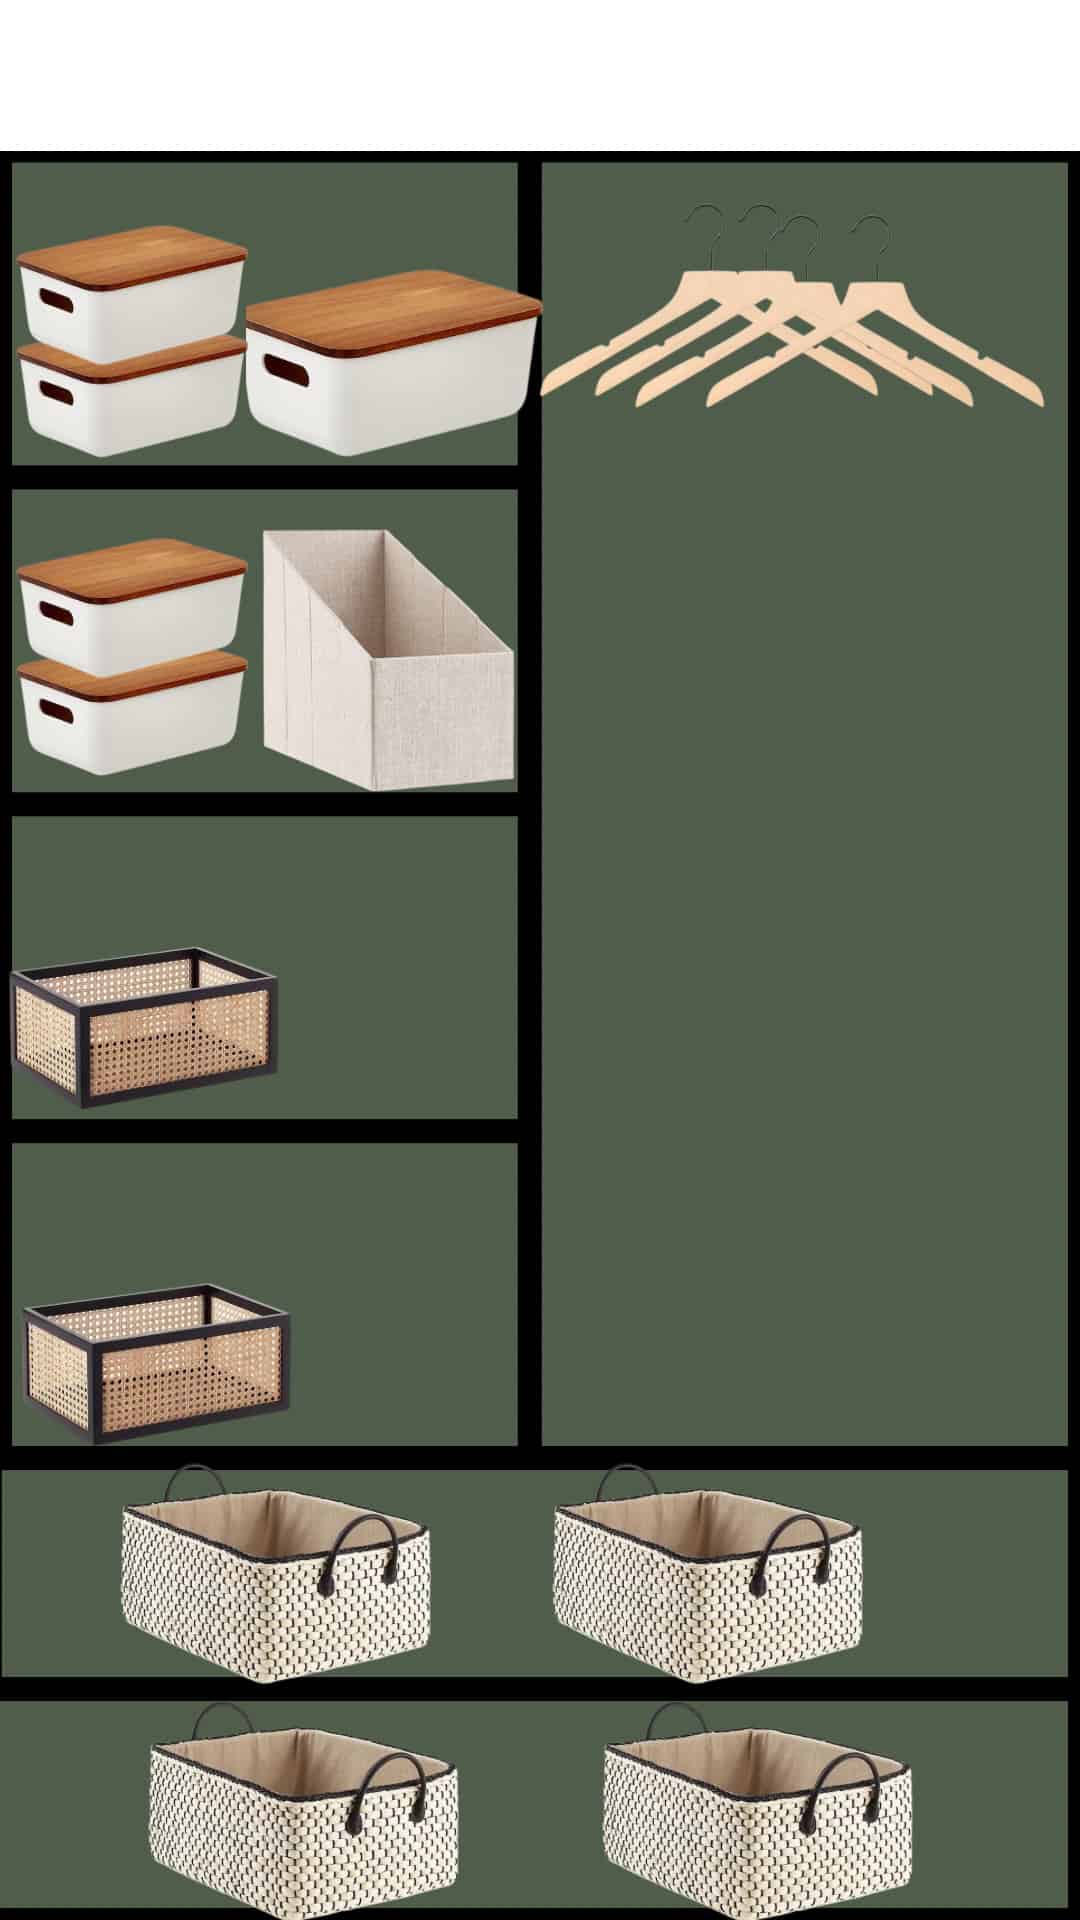
Having a plan is key and you won’t regret taking the time to sit down and plot it all out ahead of time.
When I was creating our built-ins, I planned one shelf for each person in our family. That makes it a lot easier for me to plan and gives everyone a space for all of their random stuff. The boys each have a spot for their backpacks along with a sturdy bin that can hold anything else they want. This usually means hats, books or small toys they don’t feel like carrying upstairs yet, or water bottles. It’s random and I try not to micromanage in – the bin contains their chaos and I don’t have to think about it!
2. Skip the see-through storage bins.
This was a big lesson for me this time around and I think it has made a big difference in how the closet feels! Last time I bought stuff to organize this closet, I used my favorite see-through storage bins. I use them all over my house because I love how easy it is to see what’s inside and find things when I’m looking.
The only problem? They can add a lot of visual clutter to a space, too! In this closet, we mostly know what’s in each bin. There aren’t as many categories as there are in our pantry or the art closet, so I don’t need to be able to see inside the bins. It just stressed me out!
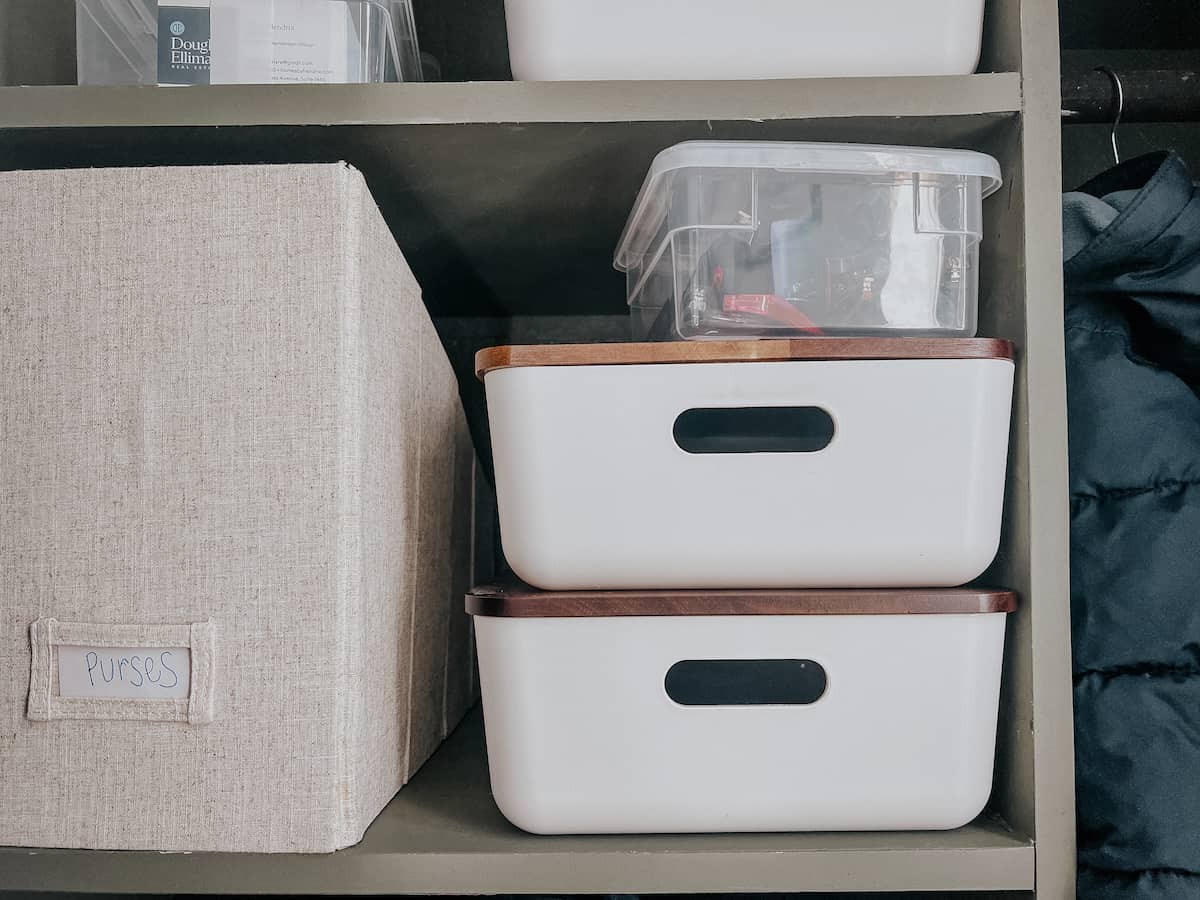
So instead, I opted for bins that would hide the clutter a bit. For mine and Corey’s shelves, I also went with baskets that have lids. We access the things in ours less frequently, so it’s preferable to be able to stack them and keep everything fully hidden away. The boys use their bins on the daily, so they’re super sturdy and don’t have lids on them.
3. Label everything. Always.
I mean, this tip goes into pretty much every post about organizing, but it’s important so it’s worth repeating again and again and again. I’m a firm believer that storage systems will not last if you don’t use labels. Especially if someone other than you is going to be using them!
Make it so that your family absolutely cannot claim they don’t know where things go. I promise, it’ll make a difference. We’ve got shoe and sock baskets in the bottom of our closet, and each one is clearly labeled with what’s inside. Just adding labels to these baskets increased the likelihood that shoes would end up where they belong by a solid 90%. It was kind of like magic.
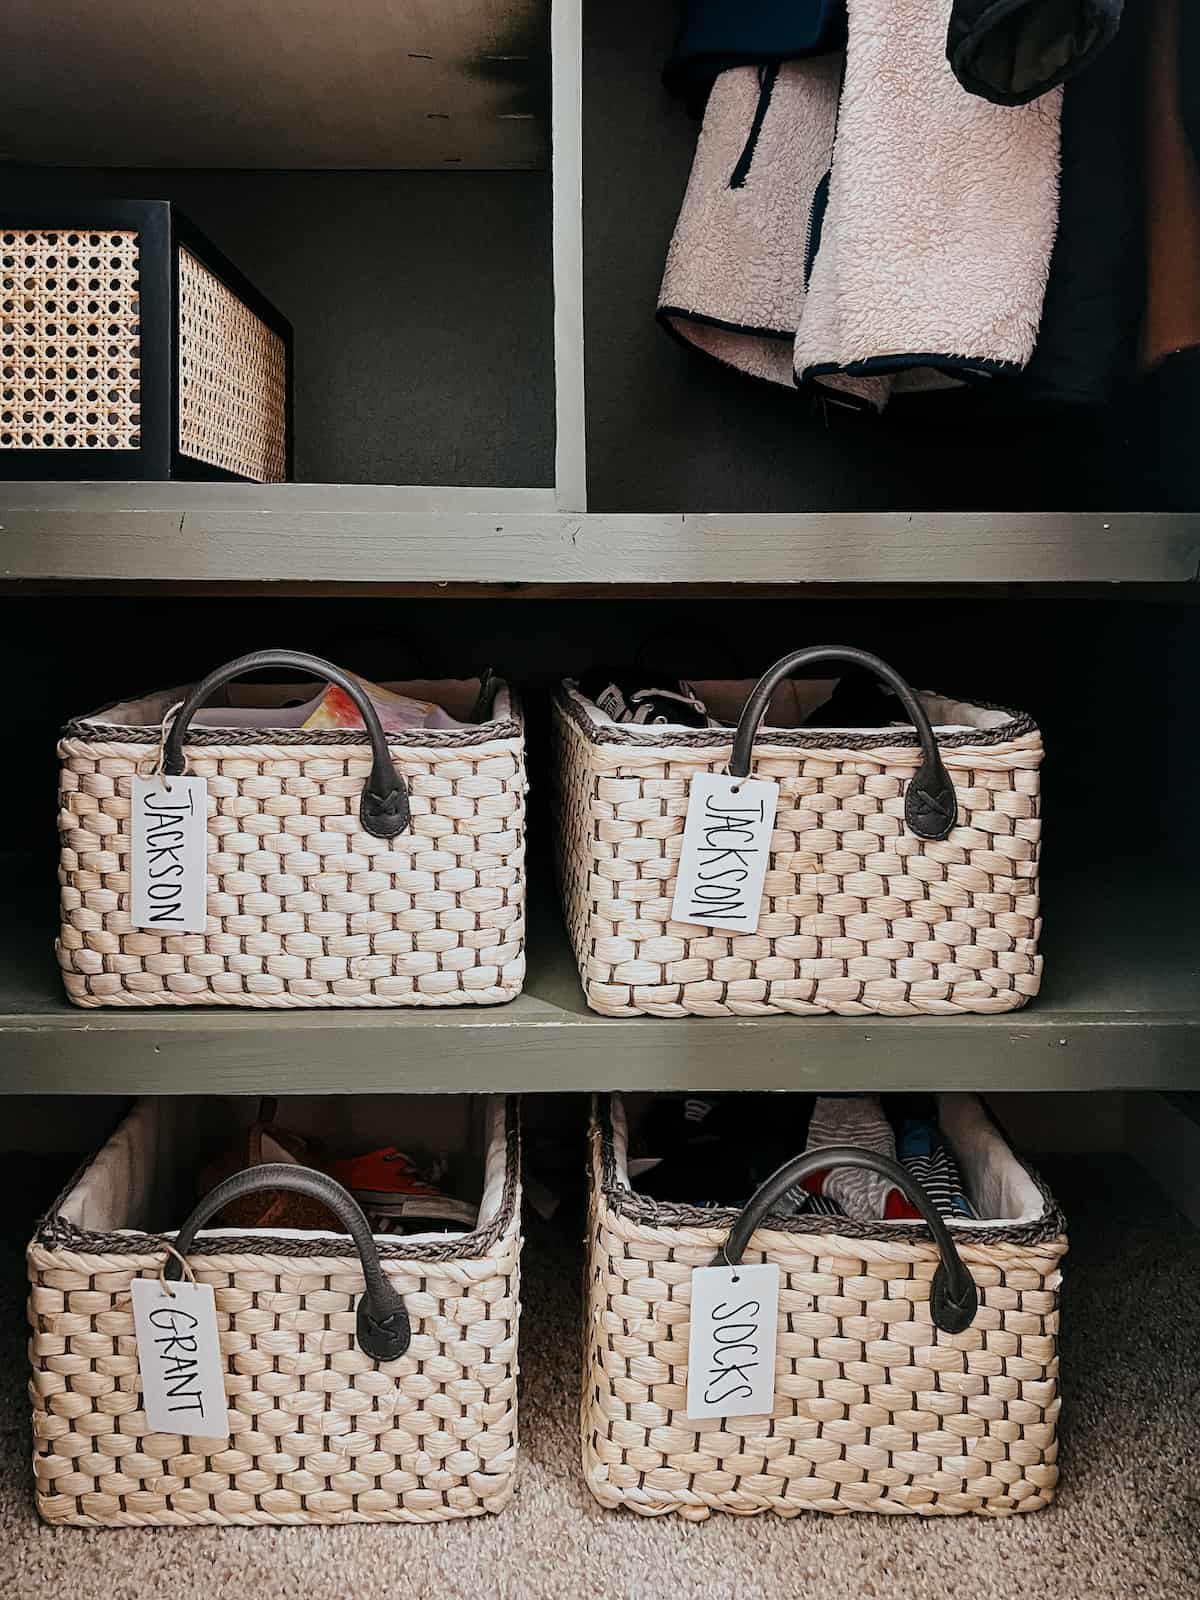
It’ll also reduce the amount of times your family asks you “hey where’s X item?” At least, after you show them the label a few times.
A note on this: I also think it’s valuable to spend a little bit of time living with your system before labeling everything. For example, in our closet we have labeled the shoe baskets but the baskets on mine and Corey’s shelves are mostly unlabeled. Why? Because I want to make sure what we have in there works for us first! After we’ve lived with it for a month or two and know we like the system, I’ll go back in and label things.
4. Know what works for your family.
I think in any organization project, it’s important to remember that what works for one family might not work for another. You could copy and paste my exact entry closet into your home and find it impossible to keep up with. That’s because every family has different systems, needs, and rhythms.
Why is it important to keep this in mind? Because you shouldn’t just go out and buy everything I’ve linked here and try to make your closet look just like mine! It probably won’t work! It’s important that you take the time to figure out what your family needs, how they use your space, and what they can keep up with.
For example – our kids do best being able to toss their shoes in a basket. Maybe you’d prefer shoe cubbies, putting them on a shelf, or keeping them in the garage!
We live in Texas, so we delegate very little space for coat storage. Maybe you need twice what we need. Or maybe you only use your coat closet to store one or two coats per person with the rest kept elsewhere.
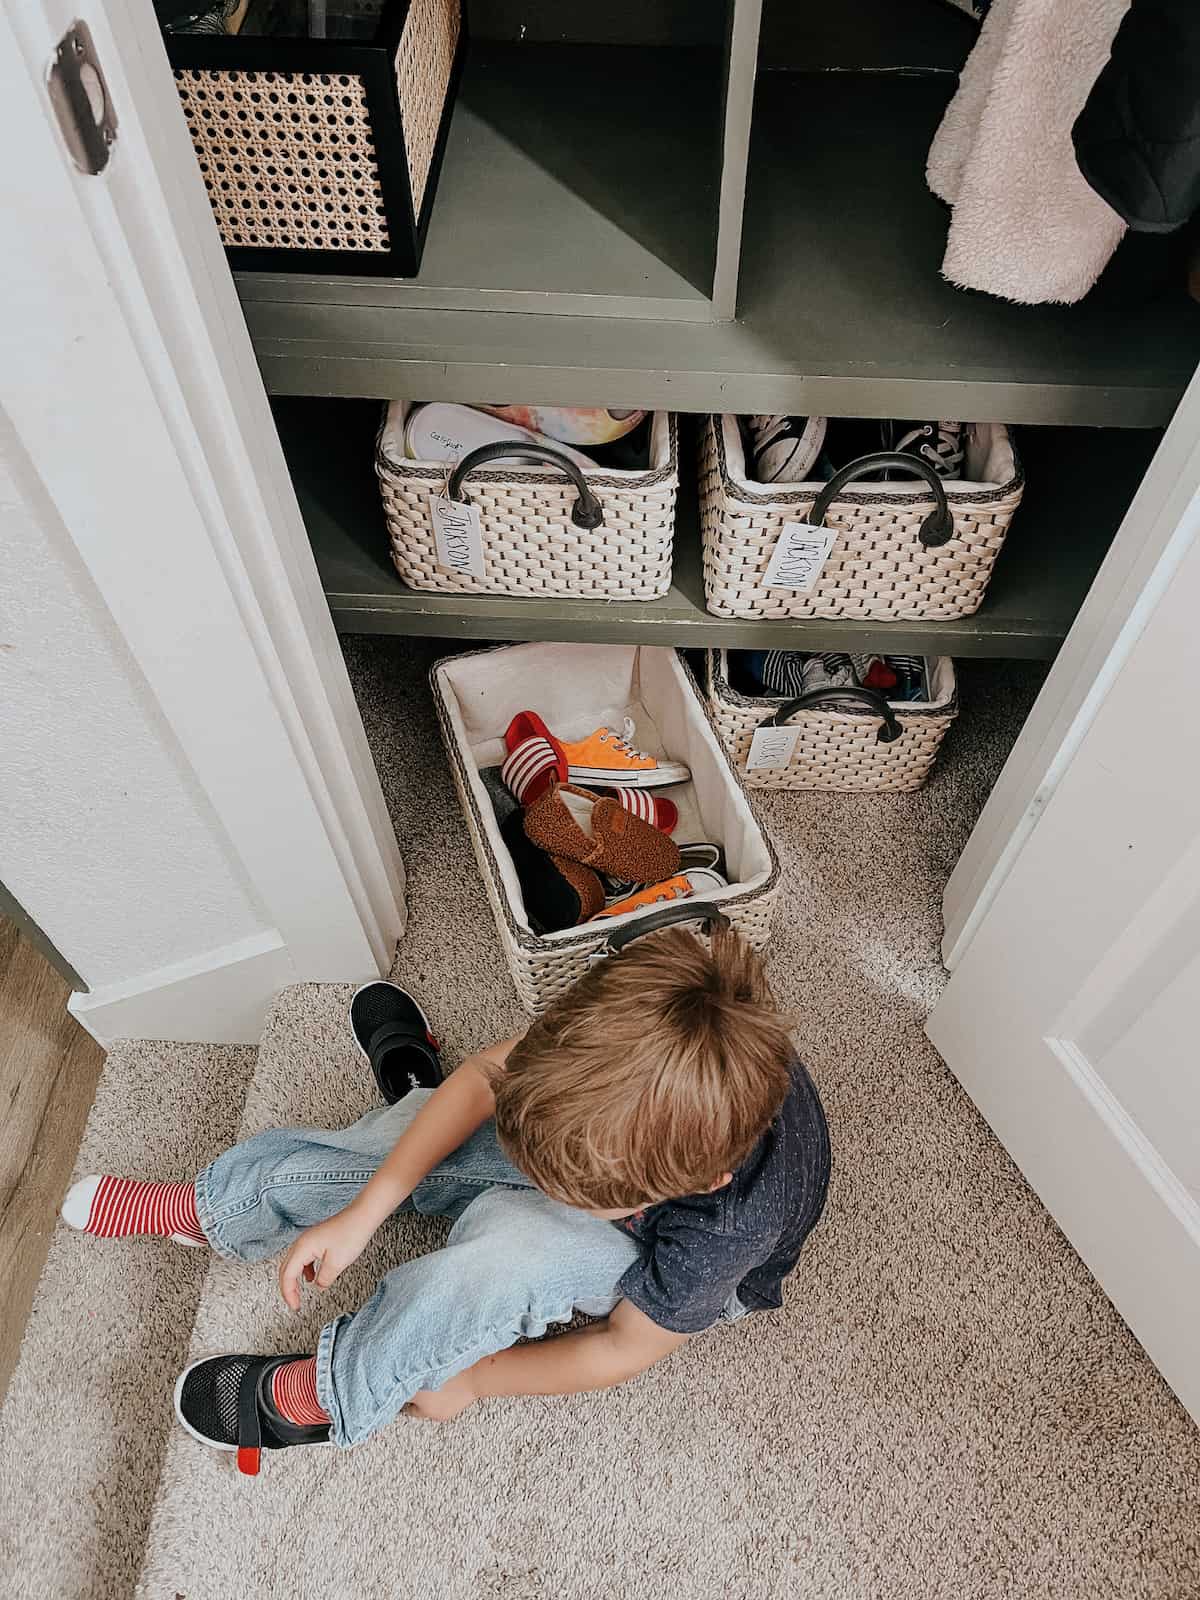
My kids come in the front door after school and drop their backpacks in the coat closet right away. Maybe you come in through the garage and a mudroom or wall hooks near that door would make more sense. Or maybe, you need to add hooks to the door because the closet doesn’t have room for a shelf.
You get the idea. Spend some time thinking about your family’s rhythms and systems and make a plan based on how you already move throughout your day. It’ll last a lot longer that way. And finally…
5. Know that it will need to be refreshed.
I think this is a key to keeping yourself sane when trying to organize your home. No system is perfect – because your family won’t be perfect about keeping up with it. Over time, various extra things will make their way into the room. Things won’t get put up where they belong, and your pretty organization efforts won’t look so pretty anymore.
It’s impossible to avoid. Just plan for it, accept it, and embrace it. It’s okay!
I generally plan on doing a closet cleanup at the beginning of each season. As our needs shift, it always helps to take a second to reset things. This time, I packed our winter gear up high, cleaned out coats we don’t need anymore, and made a little extra room for sunglasses, water bottles, and pool gear. Before school starts, I’ll take a second to remove all of the summer chaos and leave more room for backpacks!
Going into an organization project knowing that you’ll have to touch it up on occasion makes it less painful when you have to touch it up. I don’t think there’s a family on the planet that keeps up their coat closet organization perfectly all the time. I promise.
Coat Closet Organization Sources
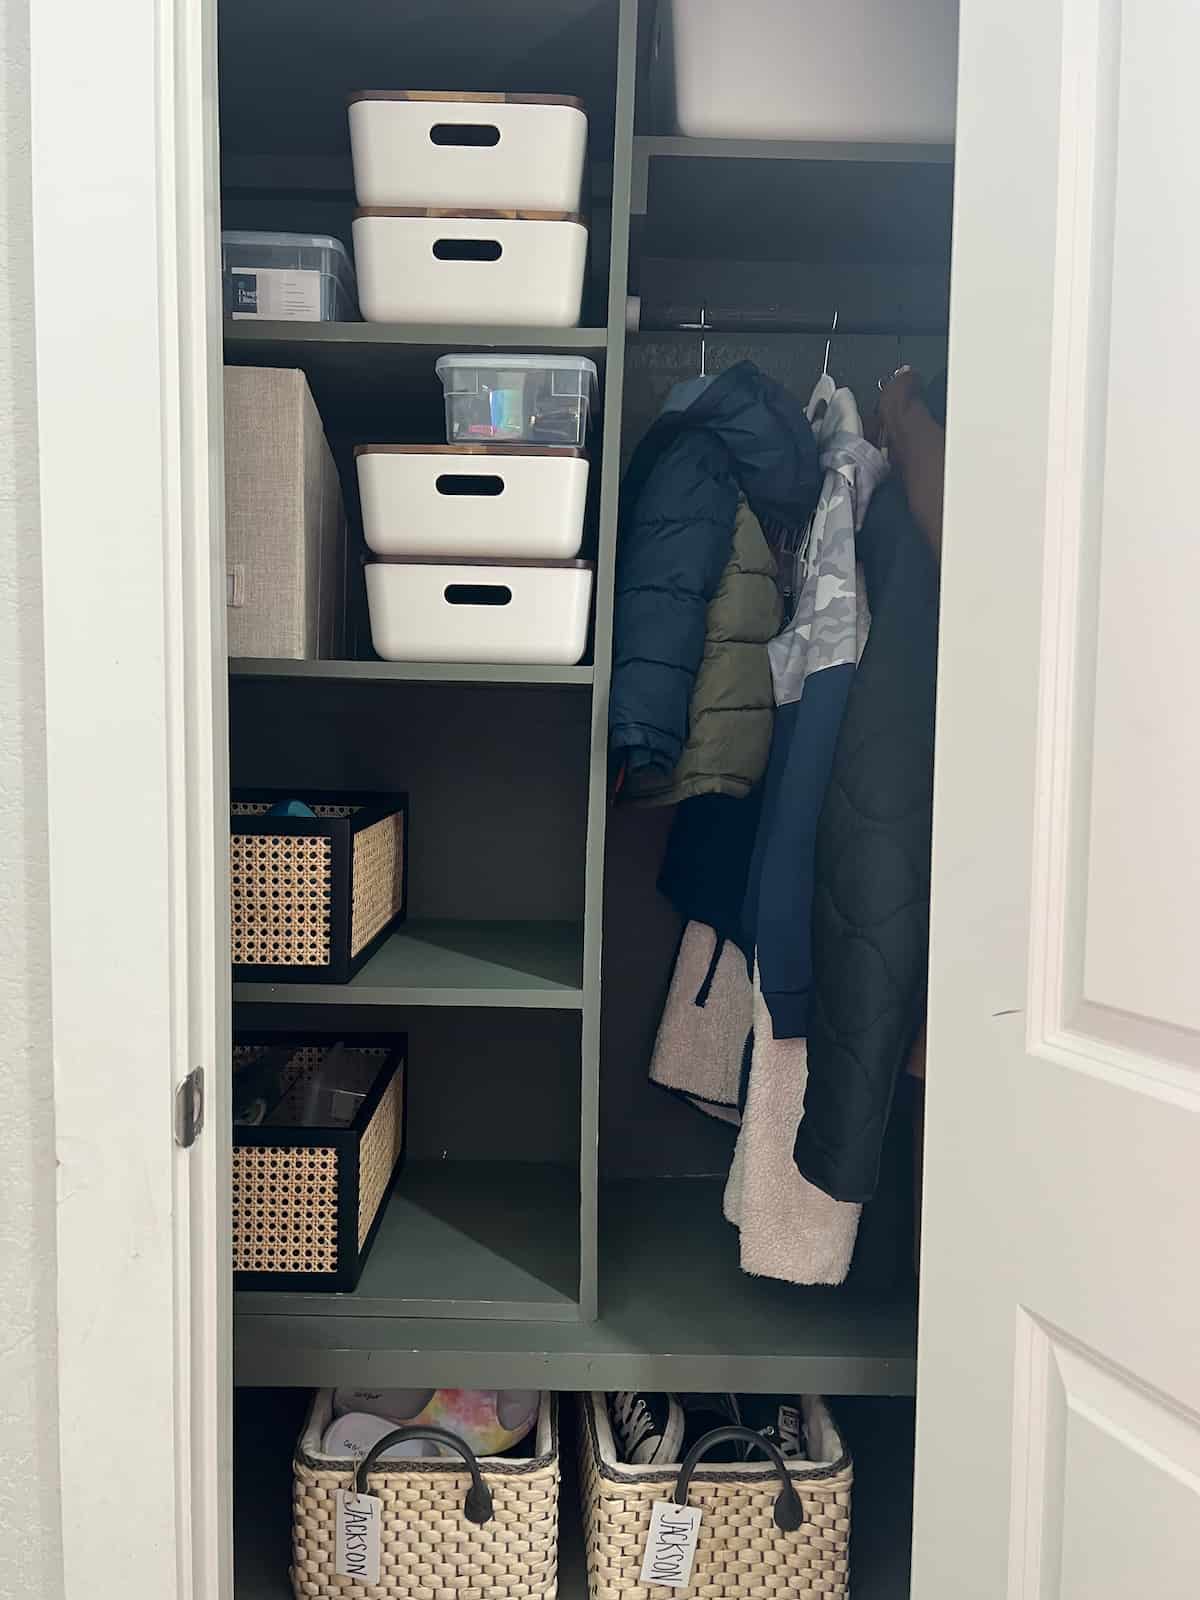
Here’s a look at everything I used in this closet. It’s only been a few weeks but so far I’m thrilled with the new setup. The kids are keeping it better organized than they ever have, and I don’t find myself cringing at it when the door gets left open. It’s all so pretty!
- White Plastic Bins (Used on the top shelves)
- Wood Lids (to go with the white plastic bins)
- Purse Storage Bin
- Accessories Case (I use these for sunglasses, business cards, and more)
- Slim Wood Hangers
- Velvet Kid-Sized Hangers
- Vertical Hanger Connectors (perfect for saving some room with the coats!)
- Black Rattan Bins
- Lidded Storage Bin (I have these tucked into the boys’ rattan baskets for extra organization)
- Shoe Storage Baskets
- Charcoal Deodorizers (tucked one into each shoe bin!)
The post Entry Coat Closet Organization (Tips & Tricks) appeared first on Love & Renovations.
